First visit to Walt Disney World: realistic family budget
Budgeting at Walt Disney World(WDW)??
We recently visited Disney World for an extended family trip. It was the kids’ first time, and my first time really having to do the legwork.
And let me tell you, there are LOTS of ways to spend your money at Disney World.
Some, like park entrance tickets, are unavoidable. Others, such as matching family shirts, or staying at an expensive on-site Disney property, are entirely avoidable. Some experiences, such as special meals with Disney characters, might be very important must-dos for your kids (or heck, why not you.)
Disney World is never going to be a “discount” vacation. But the idea is to splurge selectively and not blow your budget on *everything*. You will *want* to, especially if this is your first time. FOMO at Disney World is very real. Would your trip be better if you had booked that Cinderella castle dinner, started your own Disney pin collection, or even eaten that Mickey churro? Maybe. But the bottom line is there is so much to do at Disney, you won’t feel like you’re missing out.
If you are in the midst of planning your first trip to Disney World, and feeling overwhelmed/not sure where to start – be sure to check out our post on everything you should know to get started!
Disney logistics – park tickets
Disney park passes are expensive. (But believe it or not, this might not actually be the most experience part of your trip!) Be sure to keep an eye out for any deals. It may not be dramatic, but any bit of savings helps.
Look for discounts
For our park tickets, we had 3 “discount” options. 1) Undercover Tourist is a legit, well-vetted website with frequent deals on Disney World tickets. 2) The Disney website was running a special promotion for Canadian visitors. 3) Unions and employment work perks quite often have discounts for Disney.
Multi-day passes
Keep in mind the more days you visit, the “cheaper” your tickets get per day. Unless you are buying a single park ticket and selecting a specific day, most of the times you will be purchasing a “[multi-day] theme park ticket, valid between [date] – [date]”. For example, a 3-day park ticket valid between Feb 1 – Feb 7. You do NOT need to select or reserve your parks ahead of time. You will get to visit 1 park per day for 3 days during that time frame.
For example, we found a 3-day ticket for $405 USD. A 4-day ticket for the same time period was only $435 USD. (For $30 USD, you have another park day!) Even if you went back to the same park twice, this could potentially be a money-saver. You might be more willing to wait in lines and be less rushed, and not be compelled to pay for Lightning Lane (“fast pass”) tickets.
Park Hopper
You can buy the same types of tickets (3 day, 4 day, etc) with a Park Hopper addition. This lets you hop *between* Disney parks on the same day. (Eg. maybe you want to do Animal Kingdom in the morning and then “hop” over to Magic Kingdom.) These tickets are more expensive per day than regular park tickets.
In our opinion, especially for first time Disney go-ers, this is usually not worth getting. There is too much to see in every park to consider fitting 2 in one day. And if you feel like you might want to go back to the same park twice for a more relaxed experience, consider adding on an extra park day.
Our realistic budget
We spent 3 full days in the parks. We chose to do Magic Kingdom, Epcot, and Animal Kingdom. Ultimately, we skipped Hollywood Studios to 1) save money. Not solely on the park ticket. As we mentioned, adding a park day really doesn’t add too much more to your tickets, but for all the “extras” we would have to buy. Ie. Lightning Lanes, food, merch. 2) Our kids were not big into Star Wars or Toy Story, which are big areas of the park. We did not feel the kids were missing much skipping Hollywood Studios on this visit.
Cost: $405/ticket (same for adults and kids) – We traveled as a family of 4, with grandparents who visited the parks “a la cart”, so for intents and purposes, 4 tickets for us.
Disney logistics – accommodations
After securing your park dates, you will want to book a place to stay. For Disney World, there are 2 main options: on-property, and off-property.
On-property resorts
On-property means you are staying at a Disney resort or Disney affiliated resort. This gives you some perks during your stay, including:
- Use of Disney transportation to the parks. If you are not renting a car, staying at an on-property resort guarantees free transportation to the parks. This could be by Disney shuttle bus, monorail, or gondola (the Skyliner). Keep in mind that a resort that only offers shuttle bus could be highly inconvenient, especially if a bus is full and you have to wait for the next one.
- Disney water park access on your day of arrival (as of 2025). This would be good for hot seasons, but it was cool enough when we traveled in January the water parks were closed.
- 30 minute early park entry
- Ability to buy Lightning Lanes 7 days in advance (as opposed to 3, for off-property guests)
- Ability to make dining reservations for up to a 10 day stay. Dining reservations open 60 days in advance for *everyone*, but on-property guests can book for their entire stay. (This means they could potentially book a popular reservation up to 10 days before other guests.)
Disney has 3 tiers of resorts – from value resorts for around $200 USD/night, to moderate resorts, to deluxe resorts that cost up to $1500 USD/night.
Off-property resorts
There are big hotels and airBNB complexes all around Disney. These accommodations obviously don’t give you the above perks, but they can be cheaper and more spacious. If you have an airBNB that includes a kitchen, you can grocery shop and make some of your own meals, as opposed to eating every meal in the parks.
Our realistic budget
We booked a 10 day stay, as we wanted to combine Disney with some beaching, and explore some of Florida’s nature. It was also important for our sanity and the kids’ stamina to have rest days between the parks. We chose to stay at an airBNB about 10 minutes away from Disney’s Magic Kingdom, and only about 5 minutes away from Animal Kingdom.
This was largely because we traveled with extended family. We needed 3 bedrooms, and wanted a full kitchen. It would not have made financial sense to book multiple rooms at Disney resorts, or a hotel suite. Our airBNB had a large heated pool, water slides, a splash park, a huge playground, and tennis courts. We definitely didn’t feel we were missing out on any amenities.
While we haven’t stayed on property at WDW, we *have* stayed on property when we visited Disneyland Hong Kong several years ago. We did enjoy the themed rooms (although our airBNB was decked out in Disney, too!) and extensive grounds. The thing we loved most were the characters that wandered about during the day, and you got to meet them without having to wait in line. However, especially as Big S and Lil S have outgrown character meets, we were happy to forgo this this time around.
Cost: approx $2017 USD (for 10 nights, for 6 people) – $200/night
Disney logistics – transportation
This is obviously less of a concern if you are staying at a Disney resort. You will still need to pay for transportation to and from the airport, and if you ever want to venture “outside of Disney”. (Although you could definitely stay within Disney your entire vacation! You can even order groceries to be delivered to your hotel room.)
You can use Lyft, Uber, and there are Orland airport shuttles that connect you to Disney hotels. A popular service is MEARS Connect, and costs around $32 USD per adult for a round trip to and from the airport.
Our realistic budget
We rented a car, and used it almost every day. During our 10 days, we visited some Florida springs, and even made a day trip out of going to Tampa and Clearwater Beach. We had free parking at our airBNB, but did have to pay for parking at the Disney Parks.
Cost:
- Car rental – $396 USD for *TEN DAYS* (it boggles my mind how cheap car rentals are in the US!)
- Disney Parks parking – $30 USD/park = $90 USD for a 3 park visit
- Gas – $120 USD
Disney NEEDS – snacks and meals
This category is not really “needs”, per se. You could potentially bring all your snacks for the day, and pack sandwiches for meals. You can eat in your hotel before entering the parks. It’s doable. BUT. We didn’t have the bandwidth to prepare everything ahead of time. And really, have you even visited Disney if you didn’t have that Mickey churro? 😛
We did NOT book any dining reservations at sit down restaurants ahead of time. If you’ve been on this blog before, you will know Big S and Lil S *cannot* sit still for mealtime. However, if they were still into meeting characters, I absolutely would have booked a character meal. We did 2 character meals at our hotel when we visited Disneyland Hong Kong, and this is absolutely the most delightful way to meet characters. The characters come right up to your table, and spend more time interacting with you. However. I would not book character dining for a park day. There is already enough going on, and you don’t want to “waste” your park time on dining. I would recommended booking character dining on your rest days through the Disney resorts. Expect to pay around $60 USD per adult for character dining meals. You do NOT have to do this 60 days in advance. Many character dining experiences are still available to book the day before, or even the day off!
I did not specifically *plan* where we would eat or what snacks to try, although I did get some ideas from watching Disney content creators.
If you do want to bring some of your own food to cut down costs while in the parks, I would recommended bringing more MEALS and less SNACKS. We had some decent meals at Disney, but this was definitely more of a chore for the kids. Snacks, on the other hand, they wanted to order from every vendor we came across! The below menu is in addition to our stash of beef jerky, cookies, and granola bars.
Our realistic budget – Magic Kingdom (family of 6 that day)
- The Disney refillable popcorn bucket: $14.00 USD (ballpark depending on where you get it), with $2.50 popcorn refills during your entire stay. We got 4 refills in this park. This was absolutely worth it and such a fun and easy snack for the kids. Furthermore, kids are *less* likely to covet other treats as they pass when they are already eating something. 😛
- Snack – spring roll cart: $9.50 for 2 spring rolls, we got 2 orders. This was a rave recommendation online, and was Big S’s favourite Disney food!
- Meal – Columbia Harbour House (east coast seafood): $81 USD. Because of our constant snacking, nobody was very hungry for meals. We got 1 order of fish and chips, 1 order “mushroom roll” (vegetarian lobster roll) and chips, 1 fries, and 3 clam chowders.
- Snack – Storybook Treats: $28 USD, for 2 Aurora cones (soft serve and dole whip) and 1 regular soft serve.
- Meal – Cosmic Ray’s (diner food): $79 USD. 2 Greek salads with chicken, 2 burgers with fries. (Lil S was feeling unwell so did not eat.)
We had breakfast at our airBNB, and we had late night munchies when we returned to the airBNB.
Our realistic budget – Animal Kingdom (family of 5 that day)
- 1 popcorn refill ($2.50 USD)
- Snack – Anadapur Ice Cream Truck: $29 USD, for 5 soft serves
- Meal – Harambe Market (African flavour): $79 USD, for 1 rice bowl, 2 lamb pitas with chips, and fries
- Drink – $12 USD, for 2 Banana, Orange, Guava mocktails
- Snack – Tamu Tamu refreshments: $26 USD, for 4 Dole whip pineapple floats
- Meal – Satu’li Canteen (space-themed Avatar food :P): $118 USD, recommended as one of Disney’s top quick-serve spots. We had 1 Ocean bowl (our favourite), 2 beef bowls, and 2 crispy tofu bowls. We did not *have* to have dinner in the park, but we ate this while waiting for our Lightning Lane Avatar ride, which was way better than waiting in line!
Our realistic budget – Epcot (family of 5 that day)
This was basically a very long day of sharing snacks as we ate our way through Epcot. 😛
- 2 popcorn refills ($2.50)
- FREE – soda samples at Club Cool! The kids LOVED getting to try different coke flavours from around the world.
- Snack (faux-meal) – Choza de Margarita (Mexico pavilion): $39 USD for 2 orders of tacos and 1 order of empanadas
- Snack – Kringla Bakeri (Norway): $20 USD for 3 orders of School bread (amazing!) and 1 apple cake. Best value of the entire day.
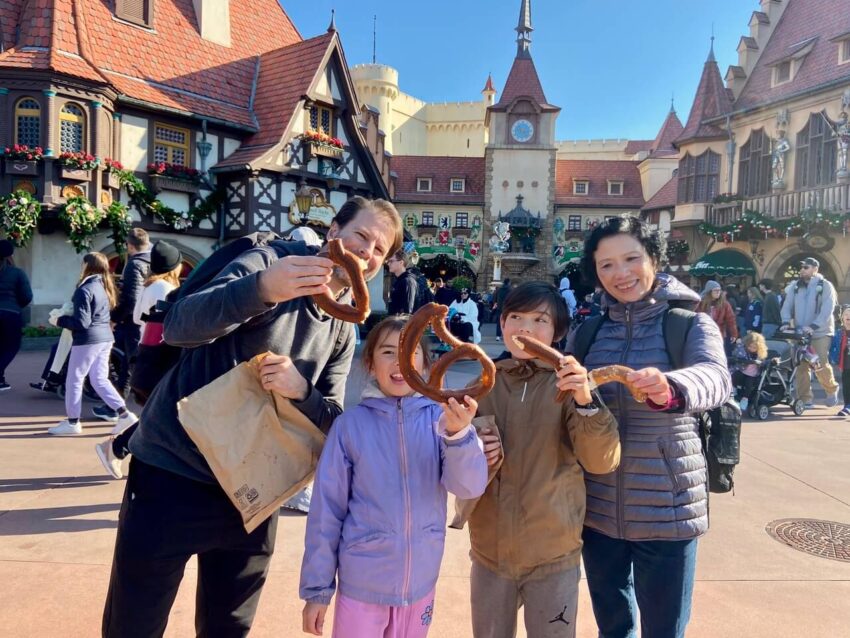
- Snack – Pretzel and Beer stand (Germany): $24 USD for 2 giant pretzels (these were underwhelming)
- Drink – Mitsokoshi (Japan): $6 USD for 2 Japanese novelty drinks
- Snack – L’artisian Des Glaces (France): $37 USD for 3 gelatos
- Snack – Les Halles bakery (France): $4.25 USD for 1 chocolate croissant
- Snack – The Refreshment Port (Canada): $14 USD for 2 poutines
Late night airBNB munchies was fresh vegetables and vegetable soup because honestly, I don’t think I had a single vegetable this day. 😛
Disney Needs – Lightning Lane passes
So, actually, nothing in these Disney “needs” category are actually needs. 😛 Lightning Lane passes are actually very pricey Disney wants – in fact, the most expensive splurge of our trip. But for us, this was an absolute need to keep our days running smoothly and the kids in good humour. Lightning Lanes also are a *huge* help for whoever is doing the planning. It minimizes how much mental gymnastics and physical getting-around you have to do just for a chance of hitting rides at its lowest wait times.
So what are Lightning Lanes? It’s Disney’s “fast pass” system you can purchase in advance to bypass most of the lines. These prices vary by day and park, within a couple of dollars. There are 2 kinds of Lightning Lanes:
The Lightning Lane Single Pass
There are available for individual rides ahead of time. If available, you get to book the ride for a specific time slot. Single Passes are available for the most popular rides. We feel these are absolutely worth it, because the rides are guaranteed to have long wait times (+ 60 mins). Most also have very cool pre-shows. They were consistently our kids’ (and our) favourite rides every park.
The Lightning Lane Multi Pass
This is a bit more complicated (and has had various iterations in past years). This pass guarantees you 3 rides for other popular attractions (rides and shows) that you can select ahead of time. Think of it as 3 “passes”. After using 1 pass, you can book another ride that is available for a later time. In this way, you can potentially go on 10+ rides using the Multi Pass, if you manage this well on your app during your day. You can use this with Park Hopper as well, and use your Multi Pass at *multiple parks*.
The Multi Pass may or may not really be worth it, depending on the park and when you visit. Some of these rides generally always have short wait times. Furthermore, there is always a chance you will NOT get a ride you want if there are no more time-slots available.
To learn more about Lightning Lanes and how to use them effectively, be sure to check out Lightning Lanes Explained.
Our realistic budget
- Lightning Lane Single Pass for Animal Kingdom’s Avatar’s Flight of Passage (for 4): $17/pp = $72.44 USD
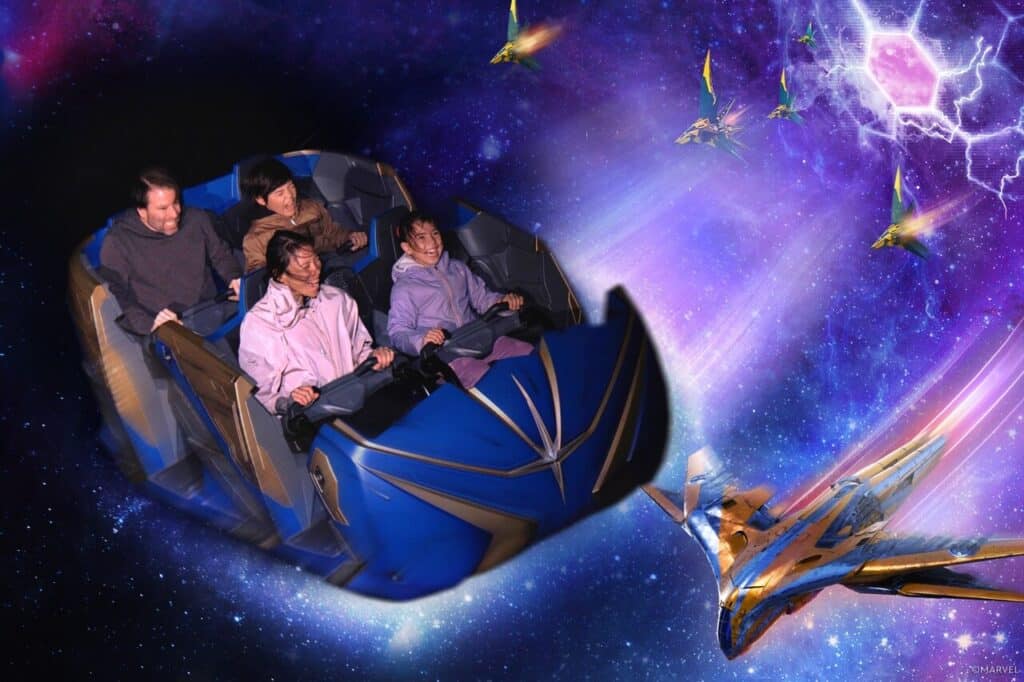
- Lightning Lane Single Pass for Epcot’s Guardians of the Galaxy, Cosmic Rewind (for 4): $18/pp = $76.68 USD
- Lightning Lane Single Pass for Magic Kingdom’s Seven Dwarf’s Mine Train (for 4), $13/pp, AND Magic Kingdom’s TRON (for 4), $21/pp = $144 USD
- Lightning Lane Multi Pass for Animal Kingdom (for 5): $19/pp = $101 USD
- Lightning Lane Multi Pass for Magic Kingdom (for 5): $32/pp = $170 USD
Was this worth it? As we said, for all the Single Passes? 100%. We would do this and recommend others do this every time if you enjoy thrill rides/coasters.
For the Multi Pass – this is debatable. We visited Disney the 2nd week of January, and the wait times were not crazy. We only really needed the pass for a few rides in Magic Kingdom (saving us maybe 1.5 hours of wait time). And for Animal Kingdom, this saved us maybe 2 hours. Having purchased it, I do not regret this at all. 2 hours is almost 1/4 of your day!
We chose NOT to buy a Multi Pass for Epcot, because two of their most popular rides our kids were not interested in riding – Frozen Ever After and Remy’s Ratatouille Adventures (weird, I know.)
Disney Extras – the merch
There is SO MUCH you can buy, and the kids get kind of googly-eyed every time they walk into a shop. Because we travel with carry on only, our kids know that when they travel they are limited to 1 stuffy, by necessity, and maybe another small souvenir. This was *hugely* helpful in setting limits without disappointment.
There is plenty for adults too, especially in Epcot. Not only is there Disney merch, but there are “around the world” things like fine glassware, beer steins, jewelry, and even your own family crest!
Our realistic budget
- Minnie ears – approx $80 USD for 2 pairs. I think we could have done without this. Lil S took her pair off halfway during the day as it bothered her head. You can also buy ears for much cheaper elsewhere – they were selling them in abundance at the Walmart by our airBNB. However, it was my birthday, and we happened to be at Magic Kingdom, and well, one thing led to another. 😛
- Long sleeve TRON shirt – $55 USD. This was Big S’s favourite ride, so he wanted a shirt!
- Remy shoulder pals – $78 USD for 2. Given they didn’t even care to ride the ride, that the kids chose these for their stuffy was a surprise. But Remy certainly is cute.
Disney extras – Memory Maker
There are 2 concepts when it comes to capturing your Disney memories. The first is “PhotoPass“. These are official Disney photos taken around the parks by official Disney photographers, usually in front of iconic sights, with characters, and in-ride photos. You do NOT pay to have these taken. On your Disney Experience App, you can access these photos with a watermark. You have the option to purchase individual photos or photo packages.
Memory Maker is a package you can purchase that either includes ALL of your parks photos per trip ($210 USD), or photos per day ($99 USD). We considered this, but opted not to do it as we did not want to wait in extra lines for photos. (This turned out to be for the best, as of all the characters, Big S and Lil S only cared to meet Mickey and Minnie.)
There are 2 photo perks you get when you purchase Lightning Lane Multi Pass. The first are all the in-ride photos where you used your Multi Pass. (And these photos are usually $16 USD per photo!) The second is called the “PhotoPass Lens“. This was a super fun little extra where the app adds fun interactive Disney effects to your selfies (Lil S particularly enjoyed finding her inner villain.) Keep in mind there are some “lenses” that only activate when you are in a particular park.
Disney budgeting final thoughts
I wasn’t as outraged about the cost of Disney as I expected to be.
Yes, the park tickets are pricey. But the other components you need to have a good time are really not extravagant. Funny enough, parking at our local amusement park also costs $30! The Lightning Lane passes are fairly priced. For a Single Pass, you are paying $20 USD (or less) for 1 hour (or more) of your time. And I was surprised to find the Disney parks food remarkably reasonably priced. Their quick service prices are comparable to most fast food places, with more diverse and quirky offerings (in fact, I paid more for a quick service ramen bowl near our hotel than many of the meals I had at Disney).
There is a lot you can buy that *is* very expensive. A lot of merchandise. Alcohol, if you are having a few drinks throughout the day. (The drinks themselves are comparable to cocktails at a bar, but buying a round of drinks for 4 adults can immediately run you up an extra $100.) Fancy dining options, if you want the opportunity to dine at the Beast’s castle, or a fancy steakhouse in Epcot’s Canada. Staying at deluxe resorts definitely will get you. But for travellers like us who don’t stay at luxury hotels anywhere else we go, there is no reason to feel obligated at Disney.
Ultimately, if you budget for park tickets and a few select splurges per day, this will be enough to have a magical experience at Disney World.
